


My girlfriend's guide to coding - Day 3: Your first webpage!
Daily bite-size tutorials for my girlfriend who want's to learn how to code!

Hey Girlfriend! So you want to learn how to code? I got you.
I know you are super busy, so I've designed these tutorials to be super bitesize. It should take no more than 15 minutes of your time to read through and try out an exercise.
Stick to it and with consistency, you'll be writing code in no time
- Your BF

Overview
Quick Recap: Last tutorial introduced HTML and taught you how to use `<div>` tags to create and nest containers on a webpage. You wrote your first HTML document and hopefully had a chance to play around a little bit.
Today, we will be making a simple personal website!
I bet you didn't think we'd be building something this early, right? I believe the best way to learn is to get your hands dirty! So get ready to build :)
In today's lesson, we will be learning some simple styles that we can apply to our <div> containers to make them look pretty with colours. We will be learning how to use a new tag too!
Let's jump in!

Styling <div> tags
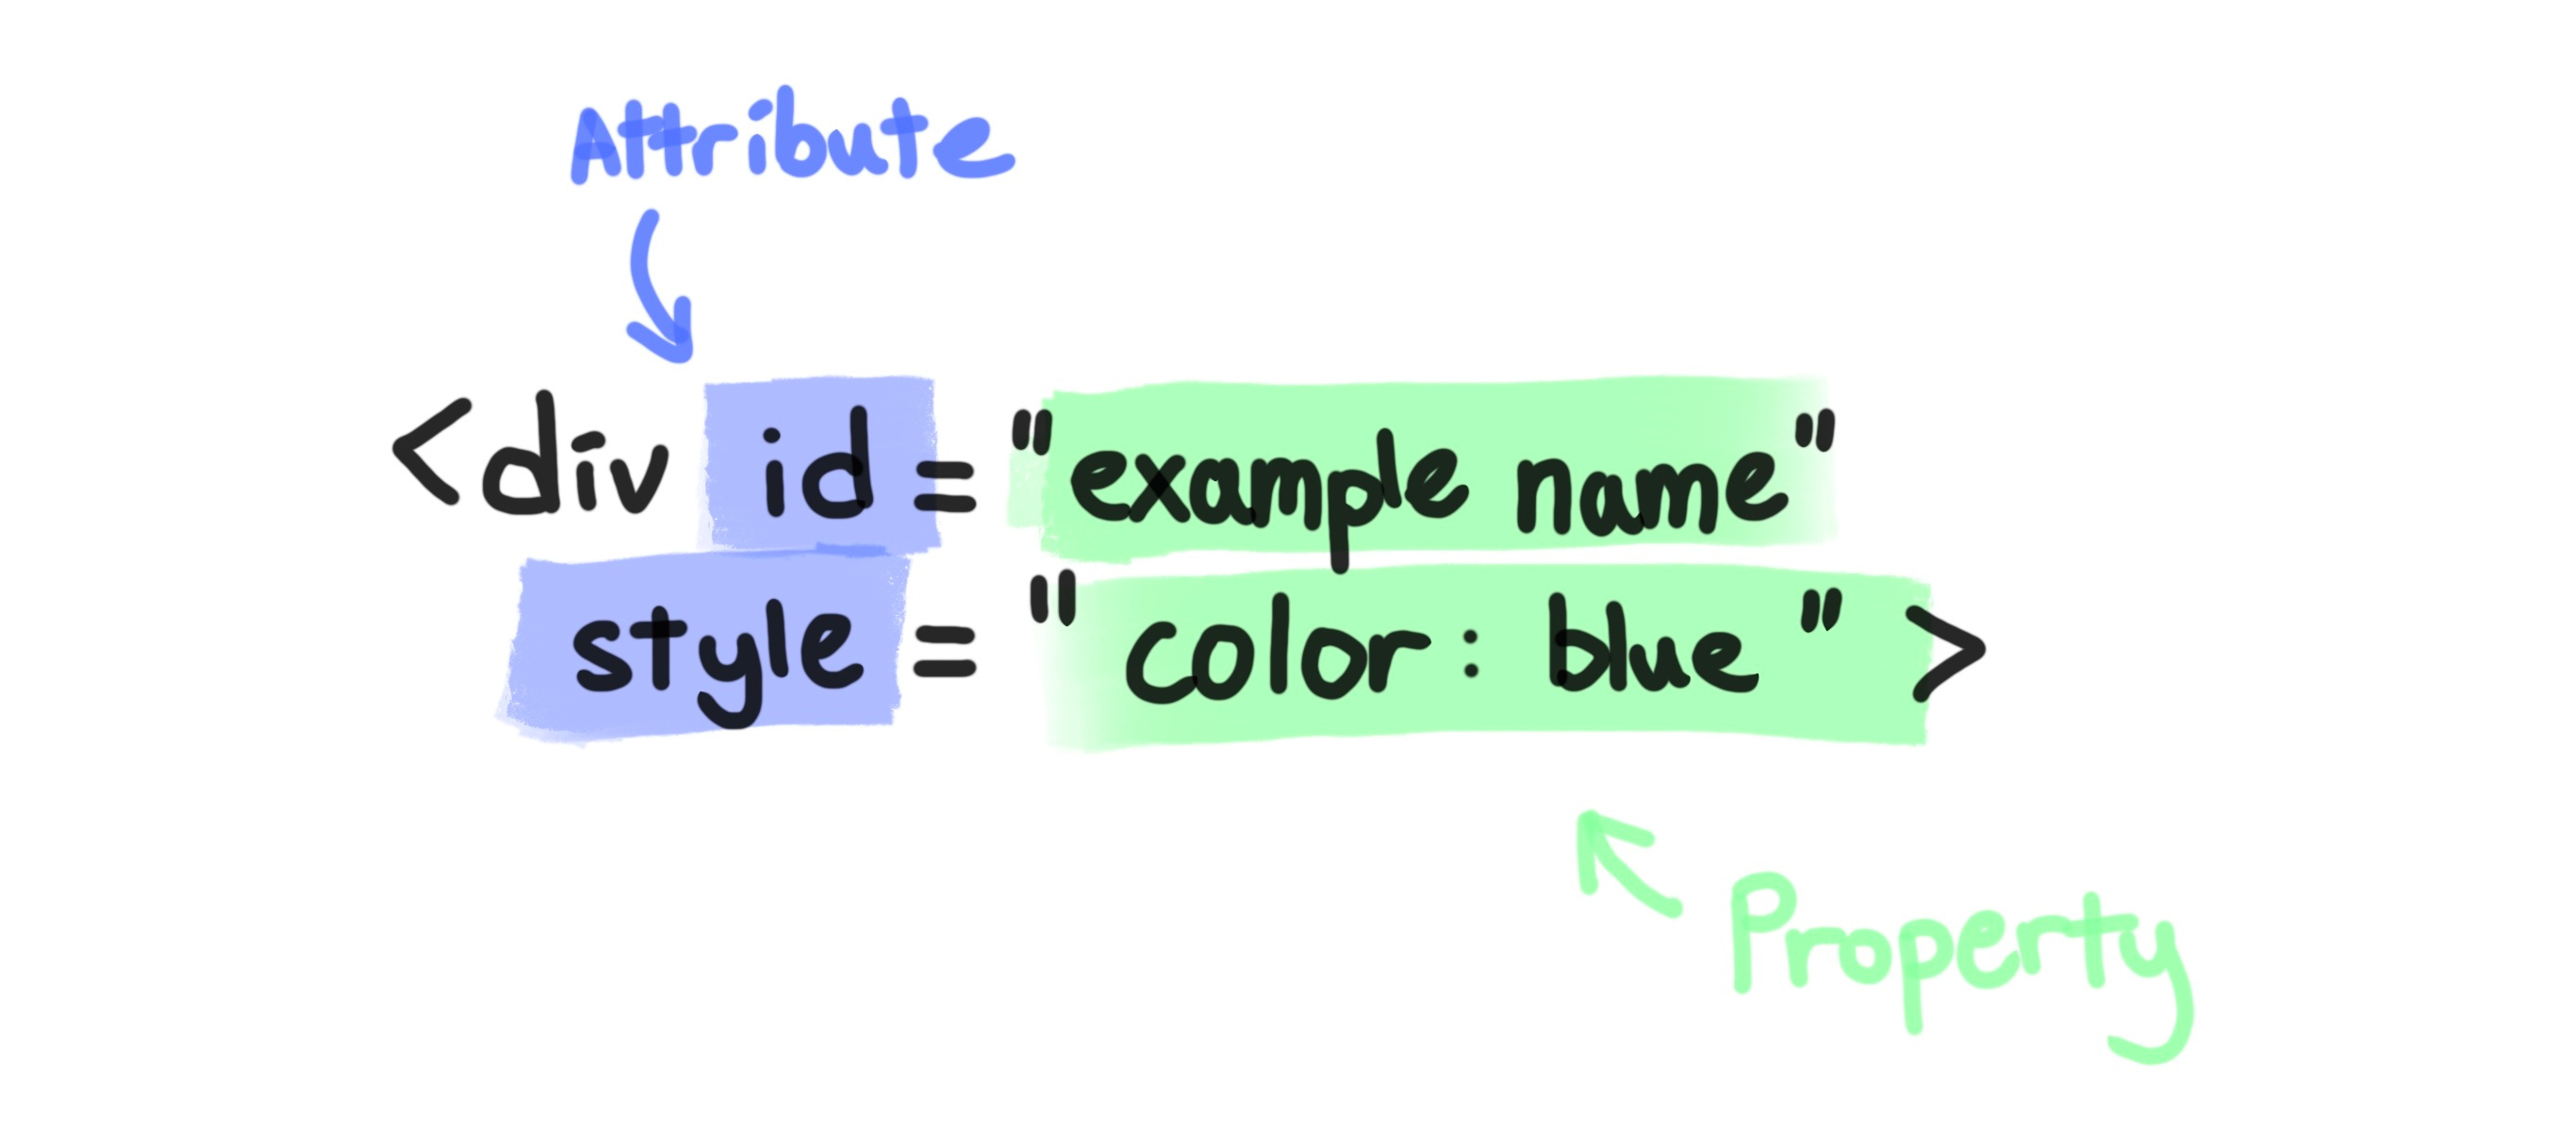
The first thing you'll learn today is that tags have attributes! Attributes are just funny, little optional settings that you can tweak to change how a tag behaves.
There are a bunch of attributes that you can tweak, but to be honest, you can go very far just knowing these three:
idclassstyle
All attributes are optional, and we will learn about id and class in future lessons. Although if you're wondering what they are, they are just identifiers (a fancy word for "names") for you and the computer to reference when doing more complex stuff.
The highlight today is playing around with the style attribute. If you remember from last week, you added the style background-color to your <div> tag to create background colours. But there are a lot more properties1 for you to play with! Here are a few that we will practice using:
paddingbordermarginfont-sizecolor
Padding, Border, Margin
To recap from last lesson, each <div></div> creates a container which you can put stuff like text or other <div> tags.
Now let’s talk about the properties that control the space around and inside these boxes (FYI box and containers refer to the same thing):
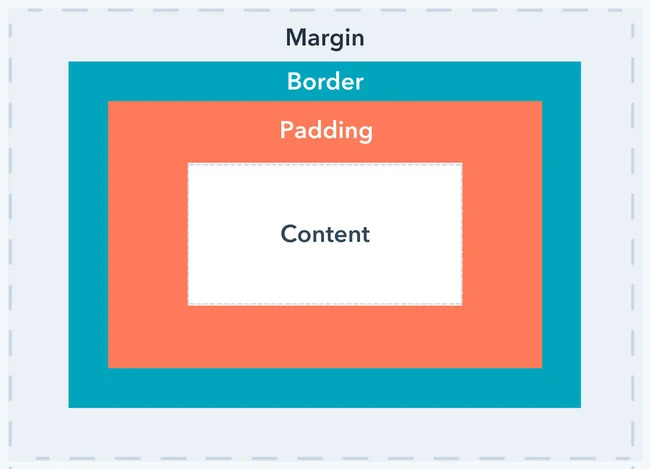
padding- space inside the box (between the edge of the box and the content)border- the line that goes around the boxmargin- space outside the box (between this box and other boxes)
Confused? Don’t worry, let's make it more clear with an example:
```

<div style="background-color: aqua">
    I'm a box without padding, border, or margin!
</div>

<div style="background-color: lime; padding: 20px;">
    I'm a fancy box with padding!
</div>

<div style="background-color: yellow; padding: 20px; border: 2px solid">
    I'm a fancier box with padding and border!
</div>

<div style="background-color: pink; padding: 20px; border: 2px solid; margin: 30px;">
    I'm the fanciest box with padding, border, and margin!
</div>

```
Wow that's a big chunk of code, but don't be intimidated. All I want you to look at is the style attribute in the <div>. In the first box, there's no padding, so we see the box hugs tightly to its contents (in this case, the text).
In the second box, we added padding: 20px. This tells the computer to add 20 pixels of space between the top, bottom, left, and right of the box and the contents itself. As you can see in the green box, there are 20 pixels of space between the text and the box edges. Also, remember that properties are separated with a semicolon inside attributes.
In the third box, we added border: 2px, which adds a 2-pixel-wide border to the box. The border colour always defaults to black. You can add another border-color property to set the border colour!
In the last box, we added margin: 30px. Margin is the space outside the box and how far it is away from other boxes. So even though the pink box looks the same inside, it now has extra breathing room between itself and the boxes above, below or beside it.
Font size and Colour
These properties are really straightforward. font-size controls the size of the font, and color controls the colour of the text. You can use them to make certain words stand out, or just to add a bit of ✨personality✨ to your page.
Look at this example:
```

<div style="font-size: 24px; color: purple;">
  I'm big and purple!
</div>

<div style="font-size: 14px; color: grey;">
  I'm smaller and more lowkey :)
</div>

```
The wonderful <img> Tag
Before you pull out the crayons and start building your website, let's learn about the <img> tag so we can add pictures to your page!

So far, we've only used the <div> tag, but HTML has loads of other tags that do different jobs. The <img> tag lets you add pictures to your webpage. Unlike <div>, it’s a self-closing tag, which means you don’t need a closing </img>, it just works with one line.
Here’s the basic format:
```
<div style="font-size: 24px; color: purple;">
A picture of a chihuahua!
</div>
<img src="./chihuahua.jpg" style="width: 200px;">
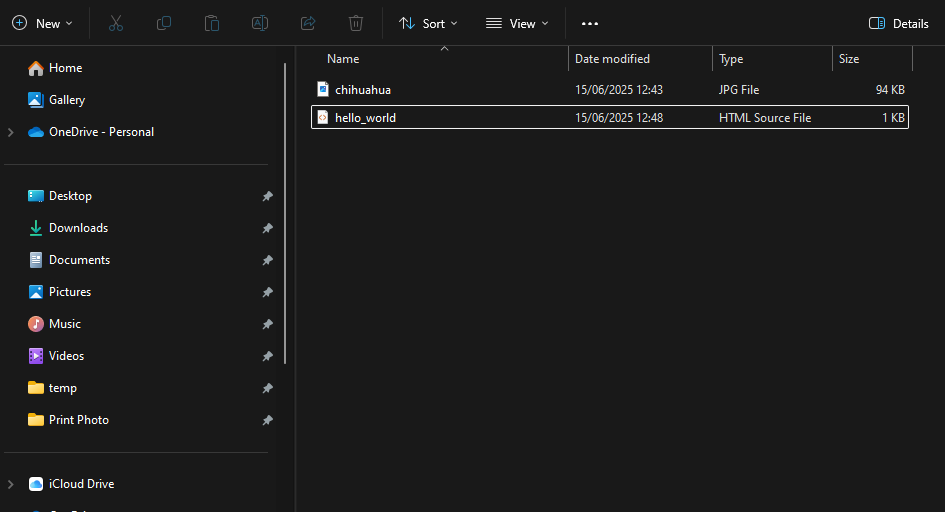
```src is an attribute that tells the browser where the image is coming from (it stands for “source”). In this case, I have a file called chihuahua.jpg in my folder. The ./ before the image name tells the computer my image file is in the same folder as my current HTML file.
When you want to add your images to your page, make sure to put the image inside the same folder as your HTML file. You can then reference it as I have done above.

Incredible! You now possess all the skills required to create a simple, static HTML website! Let's get building!
Subscribe to follow along!
I’m dropping tutorials every week, subscribe to follow this newsletter and learn how to code :D
Exercise: Build your website with HTML!
Your goal today is to use what we learned so far to build a simple HTML website. You can use the HTML file we created last lesson, or create a new one! Remember to add .html to have the right format!
Here is what your website should include:
2 Pictures (at least one of yourself)
5 containers that have different:
Coloured Text
Coloured Backgrounds
Borders
Margins
Padding
A Welcome message to your website
BONUS POINTS IF YOU MAKE A NESTED CONTAINER! If you’ve forgotten how to do it, check the last lesson.
I've added a super simple example, but I want you to get creative! Add more boxes and more colours to yours!
```

<div style="font-size: 50px; color: purple;">Remus's Website</div>

<img src="./remus.jpg" style="width: 200px">

<div style="background-color: aqua; padding: 20px; margin: 30px; font-size: 24px; color: blue;">
    Welcome to my page!
</div>

<div style="background-color: lime; padding: 20px; border: 2px solid; margin: 30px; font-size: 24px; color: red;">
    About me
</div>

<div style="background-color: pink; padding: 20px; border: 2px solid; margin: 30px; font-size: 24px; color: purple;">
    I like writing code and helping people get into coding! If you're reading this, I hope you're having a great day!
</div>

```
Next time
Awesome job! You just made your first webpage! Super proud of you :))
Next lesson, we will be looking at proper HTML document structures and slowly move our way into Cascading Style Sheets (CSS), which is another language used to properly style your website.
You’ve actually already been using CSS in your project! When you wrote things like color: red or padding: 20px, that was CSS!
We’ll be learning how to write proper HTML document structures. This will make your code neater, more professional, and easier to manage as your website grows.
But for now, take a moment to be proud. You just built a webpage from scratch using HTML and styled it with real CSS. That’s a big first step, and I’m super excited for what you’ll create next.
Who's a clever coder, yeah it's you ;)
See you next lesson <3
Written with love,
Your Boyfriend

Got Questions?
Leave a comment and someone else or I (it’ll probably be me) will help you out :)
Subscribe to follow along!
I’m dropping tutorials every week, subscribe to follow this newsletter and learn how to code :D
“properties” is the name for settings within the `style` attribute. So background-color, for example, would be referred to as a property of the style attribute.
THAT WAS SO COOL AND SATISFYING. Had way too much fun changing the colours lol. Thanks king <3